Scheduling Demonstration Part 1


|
Scheduling Demonstration Part 1 |
|
|
Our demonstration for the scheduling system will walk you through the basic functions of creating and filling multiple time slots.
Step #1: From the opportunities tab, select the opportunity for which you would like to create a schedule
Step #3: Pick any future day during the current month by selecting it on the calendar
Step #4: Drag and drop your selected opportunity from the opportunities window on to your selected day
As soon as you drop the opportunity on the date you selected, the system will open a new schedule slot profile.
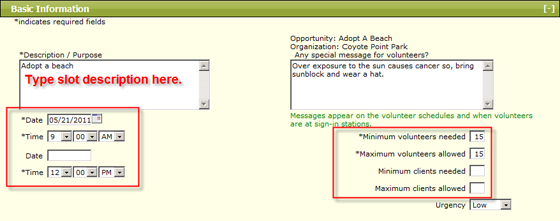
Step #5: Enter a description & time for the slot.
Use the spaces provided to enter a brief description of what the volunteer(s) will be doing during. For example, if the service opportunity is "I Can Read," you can create multiple slots and use the description field to list the specific dates and times for which you need volunteers to sign up. Volunteers will see these descriptions next to each time slot on the opportunity details screen from helphawaiischools.com. When they sign up for the slot, they also sign up for sign up for the assignment you entered here.
Entering Time: To enter the times, select the beginning and end times from the drop down lists. The date will already be filled in from the calendar screen. Schedule slots may start on one day and end on another day (i.e., go past midnight, if necessary). If you leave the "End Date" field blank, the system will assume that the start and end times are on the same date, as entered in "Start Date."
Minimum & Maximum Volunteers: Enter a minimum of one volunteer but a maximum that is equal to the number of people you are seeking plus an additional % in order to accommodate no-shows. The system will continue to post the schedule slot until the maximum number of volunteers request the slot.
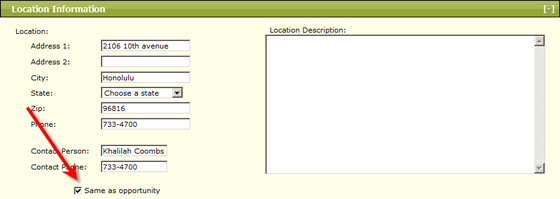
Step #6: Location Information. Enter the address where this slot occurs, or select "Same as opportunity" when applicable.
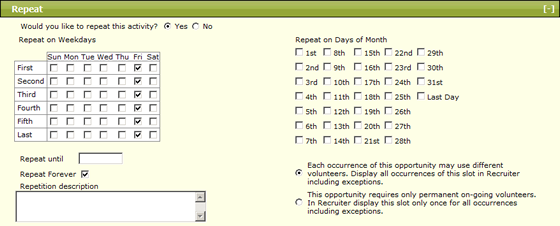
Step #7: Create a repeating pattern for your schedule slot (if needed). If you are creating the schedule for an opportunity that recurs (e.g., every Friday from 10 am until noon), please enter the pattern for the repetition in the check boxes provided. This will automatically create the slot on all future days you select in the pattern. The repetitions will continue until the Repeat Until date is reached.
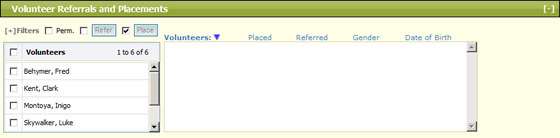
Step #8: Volunteer Referrals and Placements. Drag and drop volunteers whom you wish to request or assign to this slot.
Step #9: Automatic Log Book Entries. Select the Sign-In station(s) from which volunteers may sign in/out for this slot, if applicable. Also, tell the system if you would like it to create an automatic log book entry for this slot, and if you would like to keep volunteers for entering their own hours.
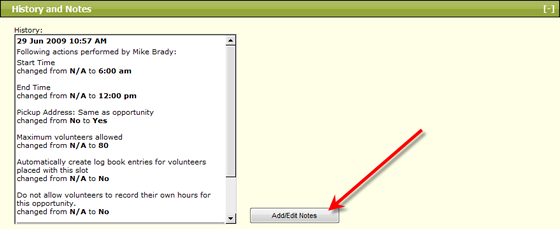
Step #10: History and Notes. This tab serves as an audit trail, detailing the date, time and name of actions taken by eCoordinator users. It documents when assignments have been made or unmade, and also allows users to enter their own notes with the "Add/Edit Notes" button.
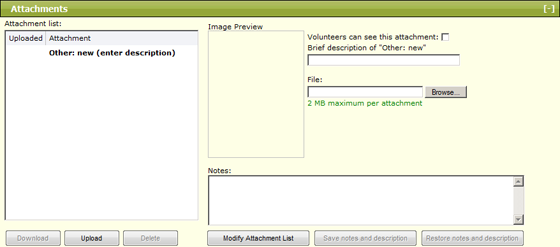
Step #11: Attachments. Like the other profiles, the schedule slot profile has the ability to attach files, such as images, documents, etc. Use this tab to attach files, as well as enter notes about the attachments. Note: there is a 2MiB maximum limit for each file.
Step #12: Click OK
You will now see your slot listed on the calendar with its description.
|