Referral and Placement Demonstration


|
Referral and Placement Demonstration |
|
|
Follow the instructions below whenever you are trying to find a service opportunity for a volunteer or approve a referral made by a specific volunteer.
Finding (or approving) Opportunities for Volunteers:
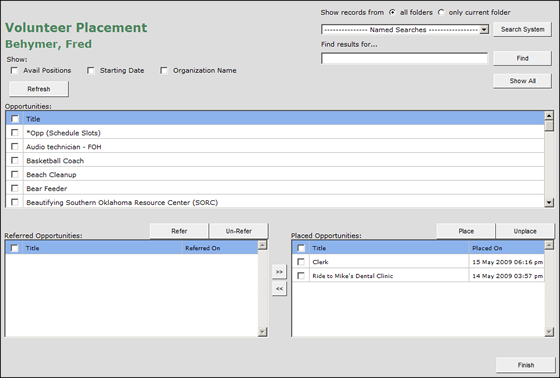
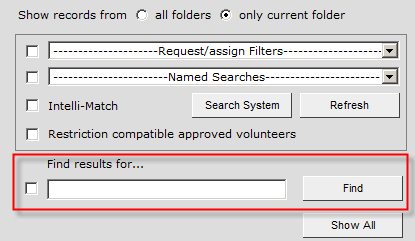
The Volunteer Placements window will display several opportunities for the volunteer. You can use the search feature to narrow the opportunities by typing an opportunity name in the search box at the top of the page and clicking find.
Select the opportunity you wish to refer for that volunteer and click the Refer/Place button.
In the top area of the screen you will notice there are ways to search for specific opportunities by entering a title or running one of the pre-built searches. The results will appear in the main window. You can highlight a specific opportunity by selecting the check box next to it. To place the volunteer to your selected service opportunity, click the title and click the Place button. There are also directional arrows between the refer and place windows that you can use to move the Volunteer to Referred or Placed as appropriate.
The Un-Refer and Unplace buttons on this screen will remove the opportunity from your current list.
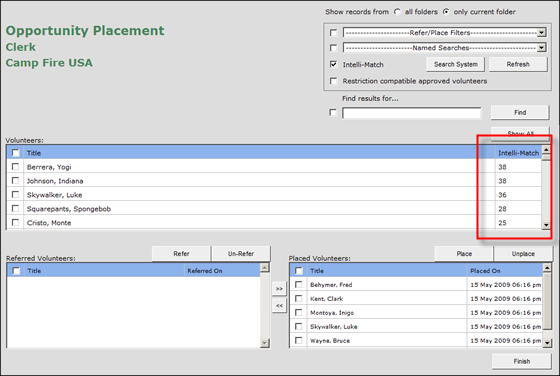
Finding Volunteers for Opportunities:
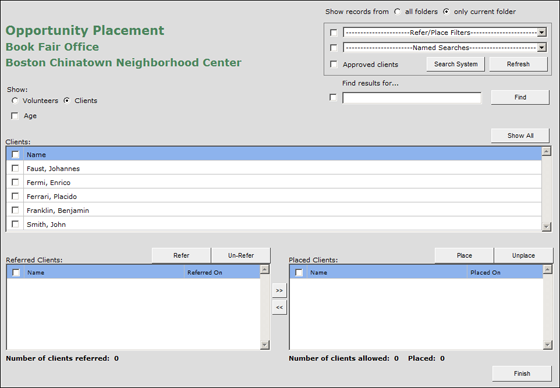
The Opportunity Placements window opens for the selected opportunity.
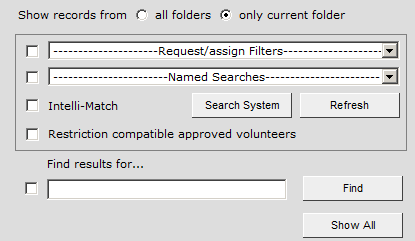
At the top you will see the name of the opportunity as well as three different options for identifying the best qualified volunteer(s) for it. These are meant to be used individually or collectively. You "activate" each option by selecting its check box.
Here is additional information on each option:
Finding Clients for Opportunities:
The Opportunity Placements window opens for the selected opportunity. Click the "Clients" radio button under the opportunity and organization title.
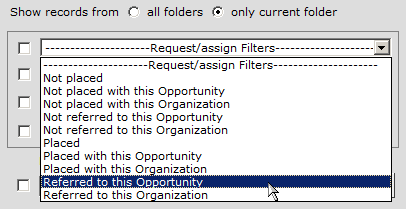
The search filters for this view are the same as from the "Volunteers" view of this same screen.
Placing or Referring from eRecruiter:
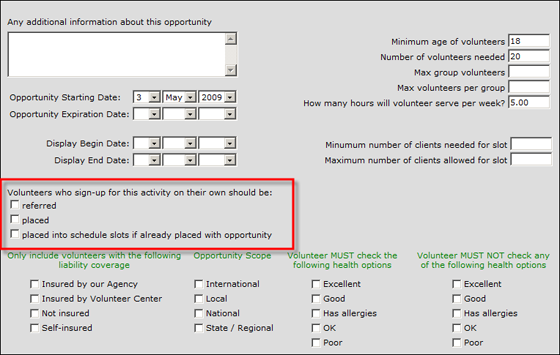
All eRecruiters must be designated as either a "Placement eRecruiter" or a "Referral eRecruiter," meaning that when volunteers sign up for opportunities online, they are either placed by default, or referred by default. However, this behavior can be overriden. For example, a school will want to set up a Referral eRecruiter, because they work with children and cannot put this vulnerable population at risk by not screening volunteers prior to placing them with an opportunity. However, the school may want to put on a workshop or a training course, and would like it to be open to the public. The eCoordinator user would not want the hassle of placing each person who signs up, since no screening process is required for this one-time opportunity. For times like these, turn to the "Additional Info" tab on the opportunity profile, and find the field labeled "Volunteers who sign-up for this activity on their own should be":
There are three checkbox options:
Whatever is selected here precludes and overrides the default eRecruiter functionality. In our example example, where the eRecruiter is set up to refer all volunteers who sign up, but the volunteer manager would like volunteers to be automatically placed with the training, the volunteer manager could select the placed checkbox. This will override the eRecruiter setting and place all volunteers who sign up for that particular opportunity via the eRecruiter.
Please note that because they are checkboxes, more than one option can be selected. These three checkboxes are also available as grid columns on the Opportunities tab.
|