Named Grids Demonstration Part 2


|
Named Grids Demonstration Part 2 |
|
|
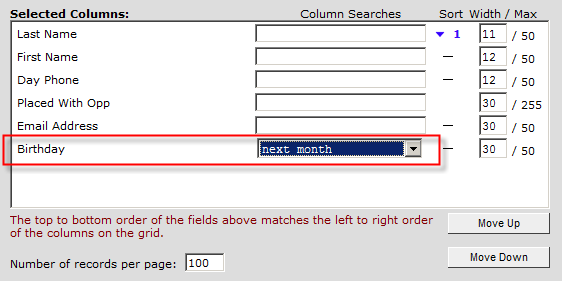
Step #6: Pre-search your new grid by one or more items. To do this, type the item you are looking for in the space provided next to each column label. There are three important things to remember when doing this:
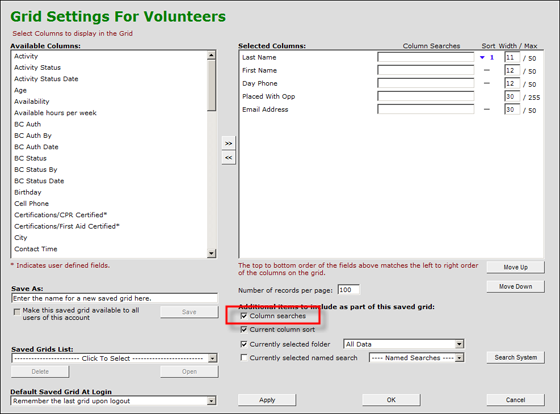
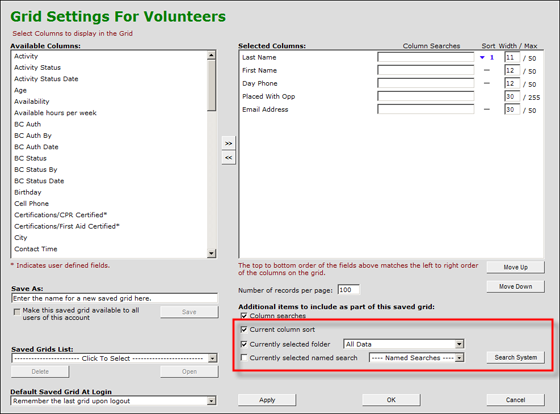
Step #7: Folders. Determine if you need to pull data from a specific folder or pre-built search. You can see the list of folders and searches in the drop-down lists shown in the image below. For example, if you are creating a grid solely to help you process new volunteers, you might select the Inbox as the folder from which this grid will pull its data, since that is the folder where all new volunteer registrants will appear when they sign up on eRecruiter. Likewise, if you need to include volunteers who have an interest in Classroom Support, for example, then select the appropriate search name from the list. Be sure to select the check box next to each item you want to include in your new grid. You may also attach and apply a named search to this grid. Named searches are discussed in the next section.
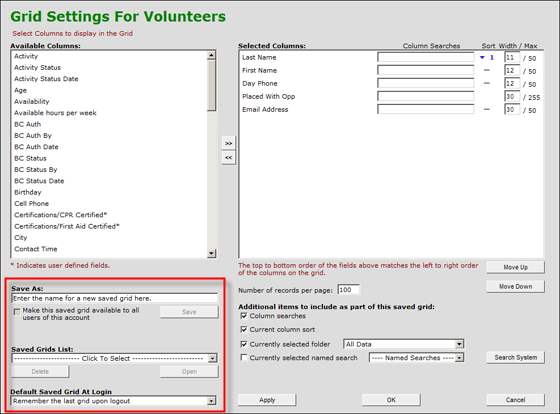
Step #8: Name your grid. Now that you are completely clear on what you are seeking, we recommend that you name your grid something that includes all of the elements.
You can make this grid available to other people who access your same eCoordinator database by clicking the checkbox below the grid name. You may also set a saved grid to be the default grid, which is run each time you login. Or, you may set eCoordinator to simply remember the last grid that was active when you last logged out.
Step #9: Click OK or Apply. The OK button will close the grid setup screen, while the Apply button will keep it open while also implementing the new grid.
Additional Grid Screen Features:
|