Named Grids Demonstration Part 1


|
Named Grids Demonstration Part 1 |
|
|
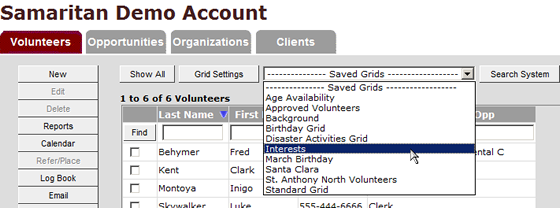
We will begin by demonstrating how to access previously made grids, then move on to the process of creating new ones. Accessing Standard Grids:
To access previously created grids, select them from the pull down menu in each of the main screens.
By selecting the name of the grid, it will automatically run and display whatever data was programmed into the grid.
Creating New Grids:
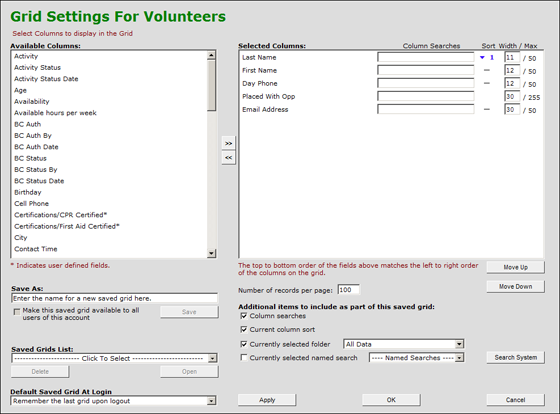
Step #1: Click the Grid Settings button. You will see:
Step #2: Select which columns you want to have in your new grid. Columns are listed down the left side under the label Available Columns. To add columns, select the columns you wish to move, then click the arrows in between the left and right panels. You may also double-click on column names to move them from one view to the other. You can select multiple columns simultaneously by holding down the Shift key while selecting the top and bottom labels in the left side list. You can also use the Ctrl key to select multiple individual column labels.
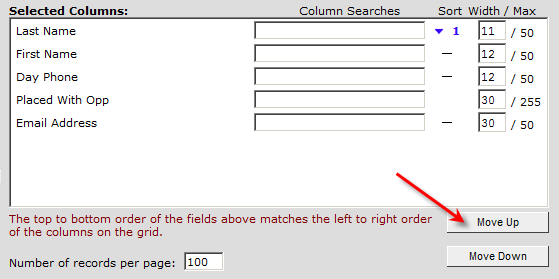
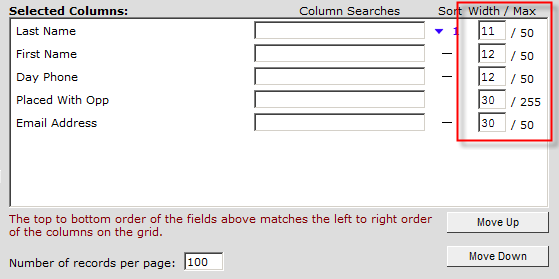
Step #3: Order the columns the way you want them viewed. Select a column label in the right side window and use the Move Up and Move Down buttons to change the column order. Columns will appear in the order they are listed, with the topmost column being on the far left in the main grid, with columns moving right as the list goes down.
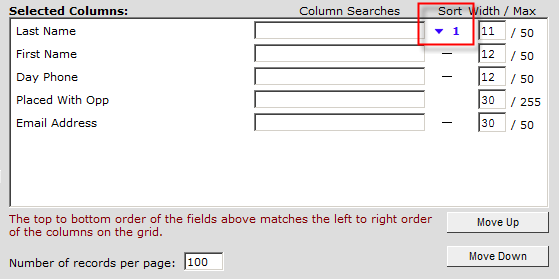
Step #4: Set your sorting order. For example: Do you want volunteer records to appear alphabetically by last name in your grid? If so, click the for the Last Name column and the little blue arrow will appear, as shown in this image.
Step #5: Set the width of each column. To do this, use the numerical space provided at the right side of each record. The numbers represent character width. The maximum width for each column is listed to the right of the / .
|