Log Book Demonstration


|
Log Book Demonstration |
|
|
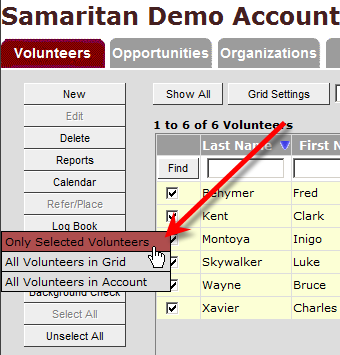
Step #1: Accessing Volunteer Log Book
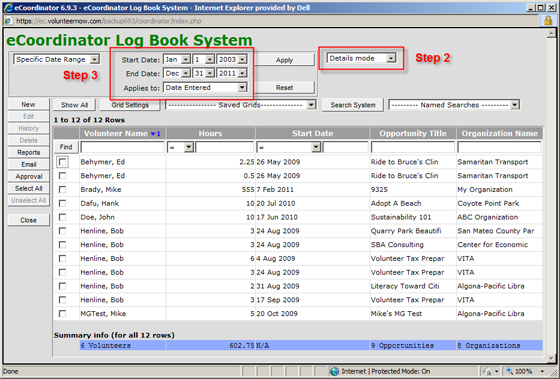
Step #2: Summary or Details mode?
You can switch from Summary mode to Details mode to see all of the information available in this grid. Summary mode shows cumulative data for each volunteer such as the total number of hours they have served. Details mode breaks out individual records showing each entry made by or for a volunteer each time they served.
Step #3: Select your date range
You can pick which dates to view records from by selecting them from the range pull down menus shown above. You can also use the pull down menu on the left to indicate whether these are relative or specific dates. Relative date options will provide you with the ability to select, for example, all records in the past month.
Step #4: Create or apply a grid (optional)
Log books all include the same type of grid setup and settings that are used in the main screens. You can therefore pre-sort records by various criteria after turning them on/off. Common uses for log book grids include the ability to view:
|