Data Grid Reports


|
Data Grid Reports |
|
|
Data Grid Reports allow you to customize the information for your reports and print or export virtually every piece of data in the system. Because of this, there are restrictions on which users may be able to build the data grid report. If you do have access then open the Data Grid Report from the Reports button on the left side of the screen or from the Report All dropdown box at the top of the screen.
Step #1: Use your pre-built grids as well as searches and sorting to get the data you want for your report in to a main grid.
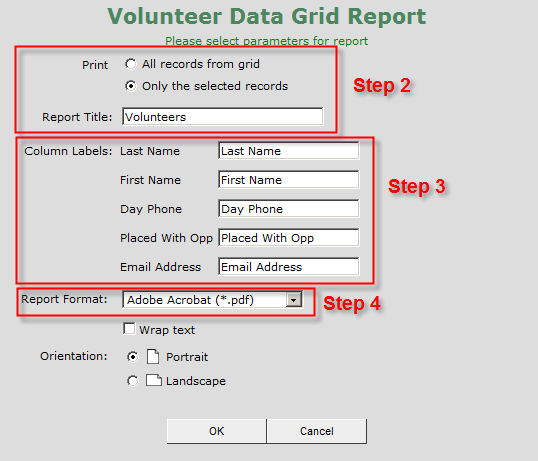
Step #2: Select your title and data source
Use the fields shown at the top of the setup screen to enter a title for your report and indicate whether you are building it for just the selected volunteers or "All Volunteers in Grid." If you select the latter, it will print or export all data in the current data grid regardless of whether or not said data is viewable. In other words, if your grid results show 400 volunteers but you can only see a maximum of 100, the report will still run on all 400.
Step #3: Change column headers
You can change the headers that will appear in your printout or export file. This is usually done when you are exporting records to another software application that may require specific column titles before it will recognize data.
Step #4: Selecting your output
The pull down at the bottom of the screen allows you to indicate whether the data grid report will generate a .pdf file or a tab-delimited text (.txt) file. For this exercise, we will use the text (.txt) output option.
Note: Your computer will need to have a spreadsheet software for the next task to work (i.e., Open Office Spreadsheet, Microsoft Excel, etc.).
Step #5: Generate the text file
Click "OK."
A file will be downloaded to your computer. If you have any kind of pop-up blocking or other protective software running on your computer, you might receive a warning. When the file is ready for viewing, you will be given the option to "Open" or "Save" it. While you could save the file and then open it in another software application, we will show you how easy it is to work directly with text files.
Go ahead and click the Open button.
Step #6: Select and copy the data
In the window that appears, do the following:
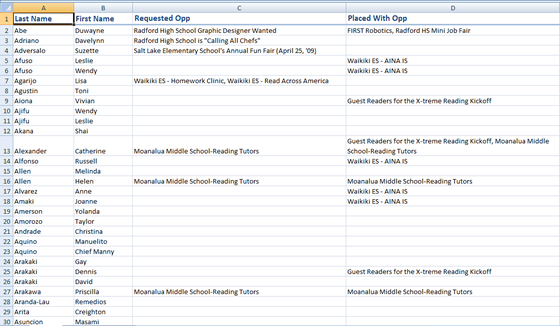
Step #7: Paste the data in to a spreadsheet
All of your data will paste into the separate rows and columns in the spreadsheet. You can then use your spreadsheets formatting options to change column width, change the cell background color, etc.
|